
Choose when to push or pull film, how EI and development time change per stop, and lab instruction tips for B&W and color.
If I had to boil it down even more, I’d say this:
Use push processing for concerts, night scenes, and dim interiors
Use pull processing for harsh sun, bright skies, and scenes with strong contrast
Keep the whole roll at one EI
Tell the lab the stock, EI, and stop change with no guesswork
One thing matters most: push/pull starts in the camera, not in the lab. The lab only follows the choice you already made.
Method | Exposure | Development | Main Result | Common Use |
|---|---|---|---|---|
Push | Less than box speed | Longer | More contrast, more grain | Low light |
Pull | More than box speed | Shorter | Softer highlights, lower contrast | Bright, harsh light |
I’d treat the rest of this guide as a simple map: how EI works, how development shifts by stop, which films handle it well, and what to write on the lab order form.
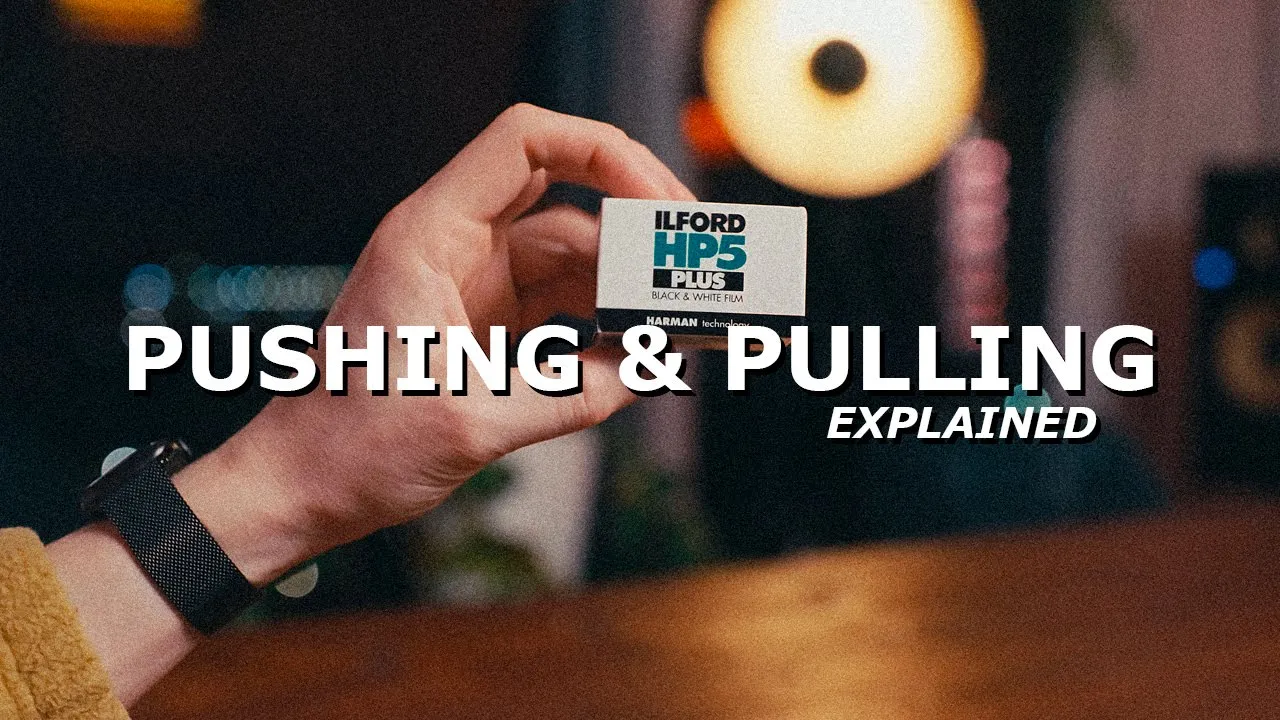
Push vs. Pull: Definitions, Exposure Index, and Core Differences
Push and pull both start with Exposure Index (EI). That’s the ISO you choose for a given roll. Box ISO is the film speed printed by the manufacturer on the package. EI is the ISO you dial into your meter or camera for that roll.
When you push or pull film, those two numbers stop matching. You rate the film at one ISO in the camera, then adjust development to make up for that change. Put simply: you change EI when you shoot, and you match development after the fact.
There’s one rule that matters a lot here: the entire roll must be shot at the same EI. You don’t make one push or pull choice frame by frame. The lab develops the whole strip one way.
How ISO Rating Shifts by Stop
Each stop changes EI by either doubling or halving the number. With ISO 400 film as the baseline, EI 800 is a +1 push, EI 1,600 is a +2 push, EI 3,200 is a +3 push, and EI 200 is a -1 pull.
The camera handles exposure. The lab handles development.
When to Use Push vs. Pull
Push processing is the usual move in low light, especially when you need a faster shutter speed to stop motion. Think concerts, indoor events, or night scenes. You’re giving the film less light than its box speed suggests, then adding development time to help make up for it.
Pull processing fits bright scenes and harsh contrast better. It’s often used when highlights might blow out, like portraits in direct sun or landscapes with bright skies and dark shadows. In that case, you give the film more light, then cut development time back.
Once that choice is made in-camera, development time shapes how strongly it shows in the final negative.
Feature | Push Processing | Pull Processing |
|---|---|---|
Exposure Direction | Less exposure than box speed | More exposure than box speed |
Development Direction | Extended (more time) | Reduced (less time) |
Main Goal | Shoot in low light / increase contrast | Manage high contrast / retain highlight detail |
Common Conditions | Concerts, night scenes, indoor events | Bright sun, portraits, high-contrast landscapes |
Typical Result | More grain, higher contrast | Finer grain, smoother highlights, flatter tones |
How Development Times Change After Rating Film Differently
EI is only half the story. Development time is the other half.
Once you rate film at a different EI, the lab adjusts development time to match. That’s the step that makes your exposure choice show up in the negative. The exact time depends on the film stock, chemistry, temperature, and agitation. And agitation matters more than people sometimes think. If it stays steady, the chemistry moves across the film evenly.
Black-and-white film is usually developed at 68°F (20°C). C-41 runs at 102°F (38.9°C), so temperature control has to be tight.
Typical Time Adjustments Per Stop
Here’s the usual starting point: each stop of push adds about 25%–30% to development time. A two-stop push builds on that, which puts you closer to 50%–60% more time. A three-stop push can need 75%–100% more time.
Pull processing goes the other way. A one-stop pull usually cuts development time by about 20%–30%.
Sample Rating and Development Time Chart
Development time is what turns an exposure decision into a visible result on the negative. Treat the numbers below as starting points, not fixed rules. It’s still smart to check the film data sheet or your lab’s chart.
Rating Shift | Processing Type | Approx. Time Adjustment | What to Expect |
|---|---|---|---|
ISO 100 → 200 | Push +1 Stop | +25% to +30% | Slightly more contrast, slight grain increase |
ISO 400 → 800 | Push +1 Stop | +25% to +30% | More contrast, usable in lower light |
ISO 400 → 1,600 | Push +2 Stops | +50% to +60% | High contrast, significant grain, reduced latitude |
ISO 400 → 3,200 | Push +3 Stops | +75% to +100% | Extreme contrast and grain |
ISO 400 → 200 | Pull -1 Stop | -20% to -30% | Reduced contrast, finer grain, better highlight detail |
Those timing changes shape the film stock choices and lab instructions that come next.
Film Stocks That Work Well for Push and Pull
Some film stocks handle push and pull better than others. Before you rate film away from box speed, it helps to pick a stock with decent latitude. That matters because the stock sets the limit for how far you can go before the image starts to fall apart.
Black-and-White Stocks for Push Processing
Black-and-white film usually gives you more room to push.
Ilford HP5 Plus 400 is a dependable B&W push stock, especially at +1 to +2 stops. As you push it, grain becomes more visible and shadow detail begins to drop off.
Kodak Tri-X 400 is another solid pick for pushing. At +1 to +2 stops, it leans into a gritty, high-contrast look that a lot of photographers want on purpose.
Color Negative and ECN-2 Stocks
Color negative film needs a lighter touch. B&W stocks usually handle push processing with less drama, while color stocks need more care and tighter lab control.
Color film also tends to push less cleanly than B&W. The main limit is color crossover, which can shift shadow color and make correction harder. You may also see color shifts show up sooner as you push farther.
Kodak Portra 400 is the professional standard for color push processing. A +1 stop push to EI 800 adds contrast while keeping skin tones natural. At +2 stops (EI 1,600), the results can still work well, but grain becomes much more noticeable and exposure latitude gets tighter.
CineStill 800T is tungsten-balanced, so it works well in low light. With ECN-2 cinema stocks, the same push and pull rules still apply, but they need the right chemistry and a lab that knows how to process them.
Use the table below as a starting point. Then check the lab's tested times for your exact stock and chemistry.
Film Stock | Type | Practical Push Range | Practical Pull Range | Typical Visual Result |
|---|---|---|---|---|
Ilford HP5 Plus 400 | B&W | +1 to +3 stops | -1 stop | Classic grain, high contrast, versatile |
Kodak Tri-X 400 | B&W | +1 to +2 stops | -1 stop | Iconic tonal rendering, increased grain |
Kodak Portra 400 | Color Neg | +1 to +2 stops | -1 stop | Increased contrast, natural skin tones, visible grain at +2 |
CineStill 800T | Color Neg | +1 to +2 stops | -1 stop | Distinctive halation, high contrast, ideal for low-light/tungsten |
Kodak Gold 200/400 | Color Neg | +1 stop | -1 stop | High saturation and more snap; relatively tolerant of processing shifts |
Lab Instructions, Image Tradeoffs, and Key Takeaways
How to Give Push and Pull Instructions to a Lab
Once you know your EI, the last step is simple: tell the lab exactly how you want the roll processed and scanned.
Write the stock, EI, and push or pull amount on both the canister and the order form. A clear note looks like this: "HP5 400 at 1600, Push +2." Use the exact EI and the exact stop change.
It also helps to add a scan note like this: do not brighten; preserve the intended contrast.
Before you drop the roll off, check two things:
Confirm the lab's push/pull policy. Many labs limit color negative requests to ±1 stop.
Check whether they charge an added fee per stop.
Image Tradeoffs
Those instructions shape the final look, but there’s no free lunch.
Push and pull change speed, contrast, grain, and detail. That’s the deal: you gain something, and you give something up.
Image Quality Factor | Pushing | Pulling |
|---|---|---|
Contrast | Increased; more "punch" | Decreased; flatter tonality |
Grain | More visible; coarser texture | Smoother; finer grain structure |
Shadow Detail | Reduced; shadows can go muddy or fully black | Preserved; better detail in dark areas |
Highlight Control | Highlights can blow out or go dense | Improved; highlights stay open |
Color Shifts | Potential color shifts | More muted or pastel-like tones |
Best Use | Low light or high-action situations | High-contrast scenes or bright sunlight |
In practice, the rules are pretty straightforward: keep the whole roll at one EI, check your lab’s push/pull policy, and give clear instructions every time.

Let’s keep in touch.
Discover more about high-performance web design. Follow us on Twitter and Instagram.